
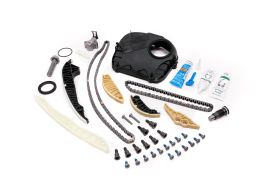
How to Replace 2.0t TSI Timing Chains


Today we’re going to talk about replacing the timing chain, timing chain guides, timing chain tensioner on Volkswagen and Audi 2.0T TSI engines. If you are not familiar with the issues around this, take a look here for TSI Timing Chain Issues.
This will be a step by step process of how to replace the components, but will require the technical skill for the job. This would be considered a moderate to advanced DIY, which is why this write up will not be showing every single step. This write up is inteded for showing the detail around the chains and timing of the engine. It is important to note that any mistake in timing your engine will likely result in major engine damage.

● Remove the vibration dampener
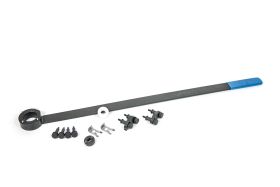
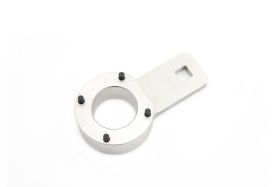
Use T10355, T10368, 24mm socket on a breaker bar, and a second person. Have the second person hold the T10355 on the vibration dampener and put the 24mm socket inside of the T10355 and loosen the crankshaft bolt. Remove the crankshaft bolt and slide the T10368 onto the crank bolt, remove the vibration dampener and reinstall the crankshaft bolt hand tight.
IMPORTANT NOTE: The vibration dampener uses teeth that mesh with the lower timing gear, which then mesh with the crank shaft. These teeth have a single wide key. These all must match up during installation. The T10368 Lower Crank Gear Spacer tool is installed here to keep the lower crank gear in place and in the correct orientation.

● Remove the serpentine belt tensioner pulley. Use 17mm socket to remove the bolt for the pulley. Reinstall the bolt as the tensioner will need to be moved.
● Remove the bolts for the N75 valve. They are 4mm allen bolts. Slide the N75 to the side when the bolts are removed.
● Remove the turbo muffler. There are three 5mm allen bolts holding the muffler on.
● Remove the lower timing cover. The bolts for the lower timing cover are T30 torx bolts. Pry the cover off with a flat head screwdriver.
● Remove the oil pump chain. Retract the tensioning guide and lock with T40011. Remove the T30 bolt holding the guide on. The chain will sit off to the side.
● Retract the timing chain tensioner. (only if not replacing with a new one)
NOTE: There are two different style timing chain tensioners. (Photo below)
Old Style Tensioner: use a suitable tool, lift the chain tensioner locking wedge and press in the guide. Then secure the tensioner in place with locking pin T40011.
New Style Tensioner: Install the T40243, this step will be easier with a second person.
Squeeze the tensioner circlip together, push the T40243 so the tensioner retracts. Then
secure the tensioner in the retracted position with the T40267.

● Remove the two T30 bolts holding the chain tensioner to the engine block.
● Remove the chain guide on the left side. A 10mm triple square bolt holds the guide on. Remove the bolt and slide the guide downward.
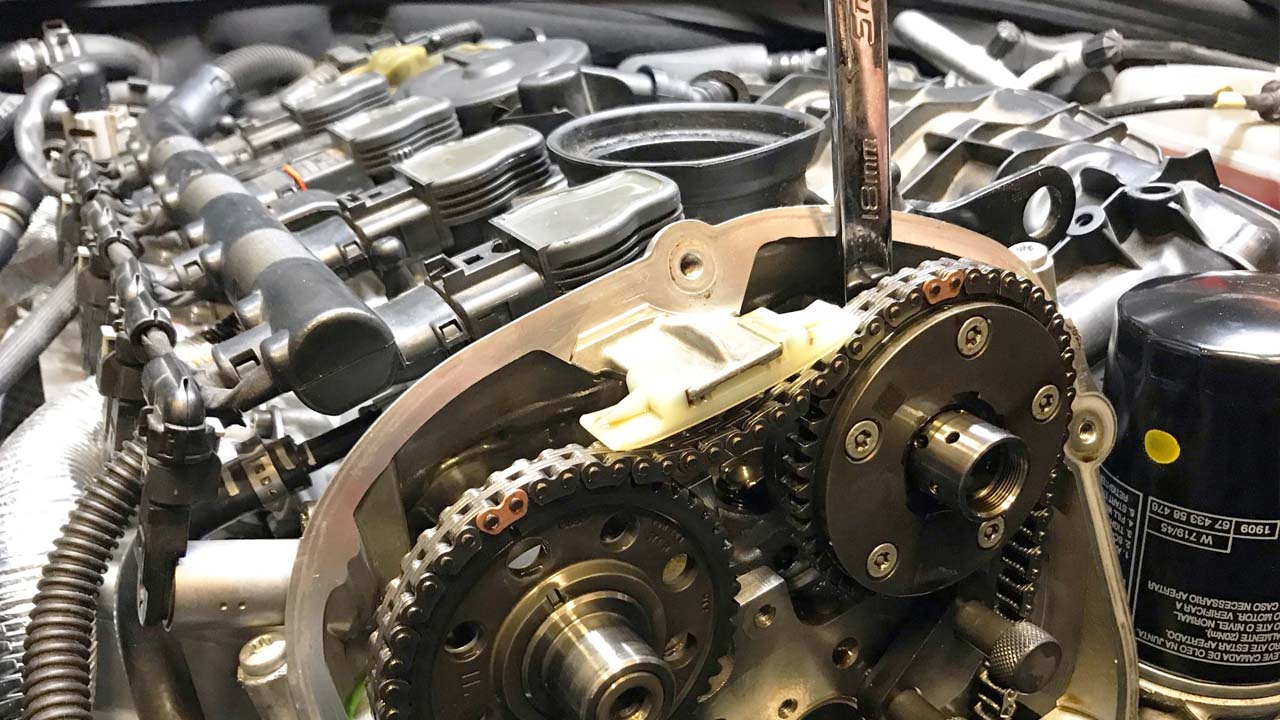
● Lock the intake and exhaust camshafts in place using T40271/1 and T40271/2
NOTE: When installing the locking tools for the camshafts, the camshafts may need to be slightly moved for the tab on the tool and the teeth on the gears to line up. For the intake camshaft, use an 18mm wrench on the shaft of the cam to move it (pictured below). For the exhaust camshaft, there are two different versions of camshafts and they have different ways to move the camshaft.
Version 1: Similar to the intake camshaft, an 18mm wrench may be used to move the camshaft.
Version 2: You will need special tool T10172 to move the camshaft.
T40271 - Cam Lock Tool Genuine VW/Audi
T40271 - Cam Lock Tool Werkzeug
Complete TSI Timing Tool Kit with T40271
● Remove the chain guide on the right side. Two 10mm triple square bolts hold the guide on.
● Remove the timing chain.
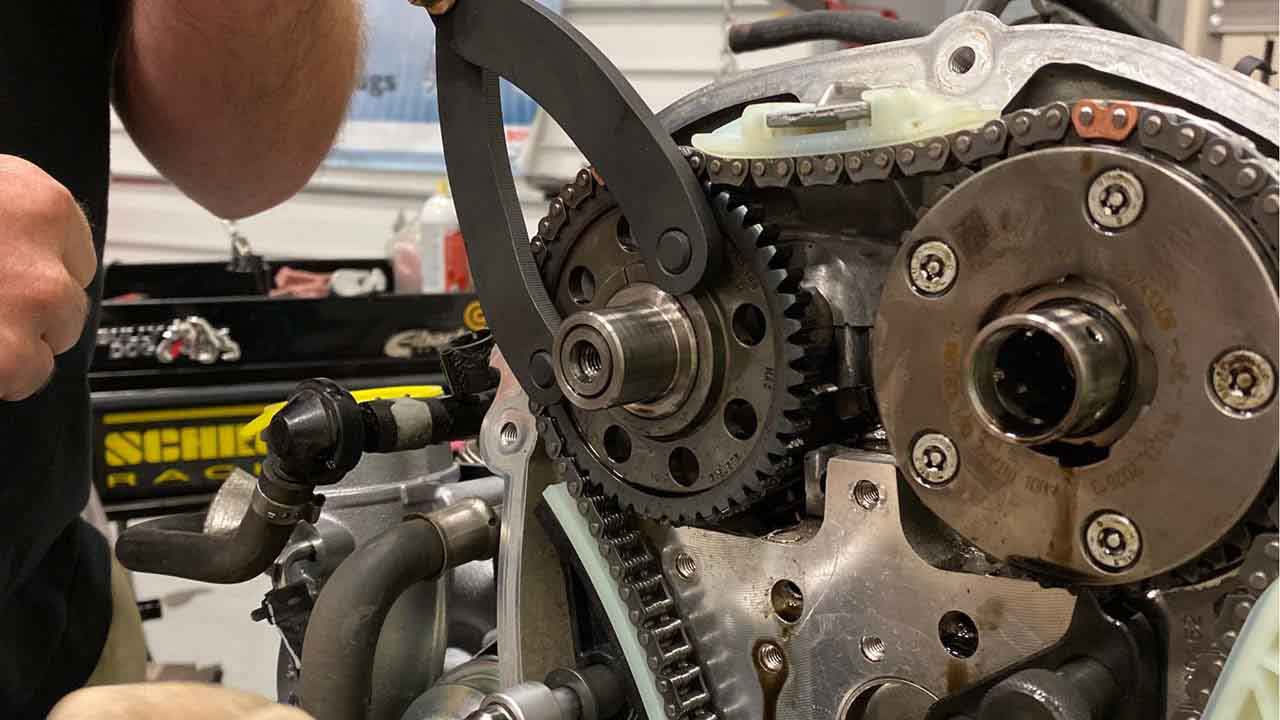
● Remove the tensioner for the balance shaft chain. The tensioner is a 27mm bolt style tensioner. (shown below)

● Remove all three guides. The guides are held on with 10mm triple square bolts.
● Remove the balance shaft chain
NOTE: Ensure the balance shafts are in time before proceeding. This will help you identify if there was a timing issue before the vehicle was taken apart. See the lower timing chain mark details below.
![]()
You are now ready to start installing all of the timing chains. Below we have a picture of the chains installed, with their timing marks. This is a very critical step to ensure you properly time your engine. You will need to get the chain on all the timing marks with 100% accuracy.
Upper Timing Chain and TIming Marks
The new upper timing chain will have 3 copper links. As pictured below you will see the 2 copper links closest together go to the camshafts. These copper links should match up with the timing marks highlighted in yellow on the camshaft gears. The Lower portion of the timing chain will go on the crank sprock on the middle row of teeth. This lower copper link should match up to the arrow stamped in your crank sprocket highlighted in yellow as well.

Lower (Balance Shaft) Timing Chain Marks
The new lower timing chain will have 3 blue grey links on it. 2 of these blue grey links will line up with the timing marks on the left and right balance shafts which are highlighted below in yellow. The other blue grey link will go to the crank gear on the inner most teeth, and has the timing mark also highlighted in yellow below.
NOTE: The original timing chain on the vehicle does not have these colored links. To ensure everything is in time the balance shaft timing marks should be pointing to the torx bolts just above the balance shaft gears shown below. This would only be relevant if you were not replacing this lower timing chain, or if you were checking timing before replacing. We recommend replacing the chain.

● Install the balance shaft (Lower) chain
● Install new guides for the balance shaft chain (Torque to 20nm)
● Ensure the chain is in time (timing mark details above)
● Install the balance shaft chain tensioner (Torque to 85nm)
● Install the camshaft timing chain. Ensure the copper links are on the timing marks
(as shown above)
● Install the new upper chain on the crankshaft sprocket. Ensure the copper link is aligned with the mark on the sprocket (as shown above)
● Install the new timing chain guide on the right side (Torque bolts to 20nm)
● Install the new tensioning guide on the left side (Torque bolt to 20nm)
NOTE: When installing the tensioning guide, The camshaft lock will have to be removed. Using a second person, hold the camshaft with either an 18mm wrench or the T10172 (depending on specific camshaft style). Remove the locking tool, then slide the new guide up from the bottom.
● Install the new timing chain tensioner (Torque the T30 bolts to 9nm)
● Pull the pin for the tensioner AFTER ensuring the chain is in time with the camshafts and the crankshaft. Squeeze bothing long upper timing chain guides the the center to allow the tensioner to extend.
IMPORTANT NOTE: Once you have done this, take the small spring clip where the tensioner meets the guide, and slide it as far back on the serated shaft as you can. This will help prevent that tensioner piston from collapsing in, if you were to have an oil pressure issue.

● Reinstall the oil pump chain (does not require timing)
● Reinstall the oil pump tensioning guide (Torque T30 bolt to 9nm)
● Turn over Engine until timing marks line up to verify timing of the engine.
● Reinstall Cam Bridge. Its often helpful to slightly rotate the cams with a wrench while installing your cam bridge, if it is having trouble going on. (Torque mounting bolts to 9nm)
● Apply RTV to the new lower timing cover
● Install the new lower timing cover. There are two different versions of timing
covers. One with 8 bolts, and one with 15 bolts
- Covers With 8 Bolts: Tighten the bolts to 4nm. Then tighten the bolts an
additional 45 degrees (⅛ turn)
- Covers With 15 Bolts: Tighten the bolts to 8nm. Then tighten the bolts an
additional 45 degrees (⅛ turn)
● Remove the old vibration dampener bolt along with the T10368.
● Reinstall the vibration dampener. Ensure the dampener is on the crank sprocket correctly as the dampener can only be installed one way. Make sure when reinstalling the vibration dampener you line up the wider key with the one on the lower crank gear. This can be difficult to tell, but is very important to ensure your engine doesnt jump time.
If the dampener is installed incorrectly, engine damage WILL occur
● Install the new vibration dampener bolt. Using a second person and the T10355, (torque the bolt to 150nm). Then tighten the bolt an additional 90 degrees. This bolt must be torqued 100% correctly or possible engine damage may occur
● Rotate the engine over by hand using the 24mm socket twice, bringing the engine back to cylinder 1 TDC
● Check the valve timing, measure with dial calipers from the outer edge of the bracket on the camshaft cover (photo examples above) to the timing mark on the intake camshaft. It should be from 61 to 64mm. Then measure from the timing mark on the exhaust camshaft to the timing mark on the intake camshaft. It should be 124 to 126mm


● Reinstall the turbo muffler and N75 valve
● Reinstall the upper timing cover with new seals. Torque the bolts to 9nm
● Reinstall the N205 valve. Torque bolts to 9nm (Wait until the dipstick tube is reinstalled to install the bolt that holds the dipstick tube and N205 valve)
● Reinstall the dipstick tube. Torque the bolts to 9nm
● Raise the engine and reinstall the engine mount bracket. Tighten to 40nm,
tighten + an additional 180 degrees
● Install the engine mount.
- Torque the bolts from the engine mount to the vehicle
body to 40nm plus an additional 90 degrees.
-Torque the bolts holding the engine
mount to the engine mount bracket to 60nm plus an additional 90 degrees
● Reinstall the serpentine belt tensioner pulley
● Reinstall the serpentine belt
● Reinstall the tab for the charge air hose
● Reinstall the charge air hose
Its imperative your engine is perfectly in time once you have completed the job. This should be double checked before starting your engine, as an out of time engine will cause major damage if started. If you are unsure of this a local proffesional in your area should be consulted.
You have now completed your 2.0t TSI Timing Chains
Write up put together by Jack Hoffmann - DAP Repair Technician
About the Author

Related Products


Audi 2.0t TSI Engine Common Problems
2018-03-15

Warehouse Associate - Cornelius NC
2026-05-19


Comments
Got an important question: when installing the balance shaft tensioner, when the engine is in the car, the drive shaft is in the way - how do you remove/replace the 27mm tensioner?
gti turbo 2007head torque
Great write up. Q: re bal shaft tensioner. Techs have advised
[1] soaking the tensioner in oil first,
[2]applying a "sealant",
[3]tensioner needs to be aligned specifically?
Could you clarify? Many thanks!
I'm going to do a gureti work
Amadu Iddrisu 123456
How can you find the tdc without the chain on ? I ask because the the marks on the camshaft gears are good but it don't matches the crank sprock markings. Is it okay if I turn the crank sprocket without the chains to find the tdc?
Hi, I believe the crank pulley bolt has now been superseded with a new part and the new correct torque is 100nm +180 degrees. Are you able to confirm please?
Mwen bezwen konnen koman modil ki dèyè abrakam nan monte nan Volkswagen Tiguan 2010