
Volkswagen 2.5 Liter 5 Cylinder Valve Cover Replacement and Help to Diagnose your Issue


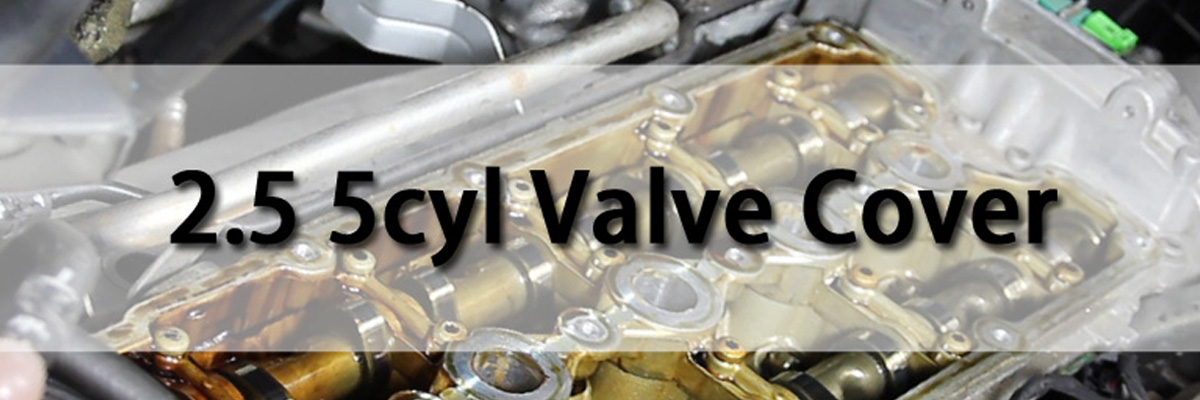
Below we have a video and a write up showing you how to replace the valve cover on your VW 2.5 5 cylinder engine.
Common Symptoms Associated with the valve cover going bad on your 2.5L 5 Cylinder will be listed below. The reason this valve cover generally needs to be replaced is due to issues related to the PCV valve inside the valve cover. The PCV valve on the 2.5 engine is built into the valve cover and uses a diaphragm style valve. When this valve fails it has a tendency to tear allowing a large vacuum leak.
The tearing of the 2.5 PCV valve may cause the following symptoms
• Rough or erratic Idle
• Fault Code P2279 - Intake Air Leak Detected
• Fault Code P0507 - Idle Speed Faster than Normal
• You can verify that this is your issue by attempting to remove the oil cap while the engine is running. If you cannot or it is very difficult this is likely to be your issue. This happens because when the diaphragm for the PCV valve inside the valve cover tears, it allows intake manifold vacuum inside the valve cover causing suction on the oil cap.
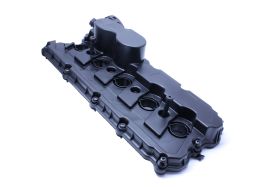
Genuine VW Replacement Valve Cover 07K-103-469-L/ 07K103469L
Volkswagen > Jetta > MK5 2005-2006-2007-2008-2009-2010
Volkswagen > Sportwagen > 2009-2010-2011-2012-2013
Volkswagen > Rabbit > MK5 2006-2007-2008-2009
Volkswagen > Golf > MK6 2010-2011-2012-2013
Volkswagen > Jetta > MK6 2011-2012-2013
Volkswagen > Passat > B7 2012-2013
Volkswagen > Beetle > 2012-2013
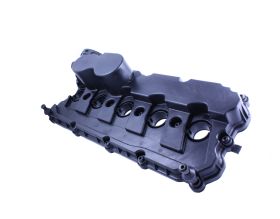
Genuine VW Replacement Valve Cover 07K-103-469-M/ 07K103469M
Volkswagen > Beetle Hardtop > 2006-2007-2008-2009-2010
Volkswagen > Beetle Convertible > 2006-2007-2008-2009-2010
This DIY pertains directly to the removal and replacement of the Volkswagen 2.5L 5 cylinder valve cover and gasket.
Disclaimer: Deutsche Auto Parts does not vouch for or warrant the accuracy, completeness or usefulness of any message, and is not responsible for the contents of any message. Only you are responsible for modifications or repairs performed to your vehicle. Perform work on your vehicle at your own risk.
We will begin with the most basic step which is removal of the engine cover itself. Although this seems very basic be sure to take caution upon removal of the engine cover. Improper removal could cause a break in the fragile plastic that makes up this cover.
1. Remove the cover for the duct between the radiator support and engine cover intake tube. There are two small tabs on either side. Lift up on these tabs and the top portion will come right off.

2. Next you will need to separate the engine cover intake tube from the radiator support. Again there are 2 small tabs on either side. Take a small screw driver and push them in as you pull back towards the vehicle.
3. Next you will need to remove the clamp from the tube that goes from the engine cover to the throttle body. To do this take your pliers and squeeze the two feet on the clamp together. As you do this be careful to keep fingers clear of the clamp. The clamp is made of sprung steel and has a lot of force which can easily break skin. Slide the clamp up onto the engine cover and you are ready for the next step.
4. Here comes the part mentioned above about taking caution. There are four studs on the engine that mount into rubber grommets attached to the underside of the engine cover. It is easiest to start from the passenger side. Grab both front and rear portions of the engine cover from underneath. Apply firm and constant upward pressure on the cover until the grommets pop off the afore mentioned studs. Once the passenger side is loose locate yourself on the driver side of the engine and repeat. Now the engine cover is free and can be set aside for later re installation.
5. Now you will need to disconnect the ignition coil connectors. One at a time apply gentle forward pressure to the connector and depress the small clip on the back of the connector. The clip will lift off a small tab located on the coil itself and will then allow you to slide the connector off the coil. Repeat this step for the remaining four ignition coils.
6. Once the connectors are all off you can remove the individual ignition coils from their location. Again with firm constant upward pressure the coils will come free and allow their removal. Set ignition coils aside for later re installation.
7. Also at this time make sure you disconnect the connector for the combi valve located at the right rear of the head. This connector is wrapped together with the ignition coil wiring harness and will also need to be removed to allow room for valve cover removal.
8. Now remove the breather hose that is attached to the diaphragm housing. There are two knurled portions that are intended to be squeezed to release locking tabs on either side of the hose. Once squeezed slide breather hose backwards to remove from valve cover.
9. Once the breather hose is out of the way lay the ignition coil harness back towards the intake manifold and lay it to rest on the manifold.
10. Now you are ready to begin removing the valve cover itself. There are 16 T30 torx bolts that hold the valve cover down. You will need to loosen each one of these before you can remove the valve cover.(The ones circled in the below picture are only the front 5. The remainder of the bolts are clearly visible from the top side of the engine)
11. Now that all the bolts are loose you are ready to remove the valve cover assembly. Pull up on the valve cover and remove it from the vehicle. Note that sometimes it is a little difficult to remove from the cylinder head and you may need to GENTLY pry between the valve cover and cylinder head to get it to break free.
12. Now that the valve cover assembly is out of the way take a clean dry rag and wipe the gasket mating surface so that it is clean and free of debris to ensure a good, clean, and proper seal between the valve cover and cylinder head.
13. Once you have ensured that your gasket surface is clean and debris free you are ready for your new valve cover to be installed. Your new valve cover comes with a new gasket and all new hardware.Set your new valve cover in place ensuring the gasket is flat against the sealing surface on the cylinder head. Thread all 16 bolts in by hand slightly before tightening any of them down fully. Once the valve cover is tightened re install your ignition coils, lay the ignition coil harness back over the valve cover gasket followed by connecting each connector to its respective coil. Also, don’t forget to reconnect the combi valve connector. Also reattach the breather hose to the valve cover and you should have what looks like this….
14. Now you can re install your engine cover. It is easiest to use the location were the oilcan is to line up the grommets on the small studs that secure the engine cover down. Press down firmly on the cover and you will feel it “snap” onto the studs.
15. Now re install the throttle body hose clamp on to the engine cover.
16. Re install the small cover over the intake duct into the engine cover.
Congratulations, you have successfully replaced your 2.5L 5 cylinder engines valve cover!
About the Author

Related Products


Audi 2.0t TSI Engine Common Problems
2018-03-15

Whats the Right Oil for a MK7.5 GTI?
2025-05-21
Whats the Right Oil for a MK7 GTI?
2025-05-21
Comments
NO TORQUE SPEC!!!!